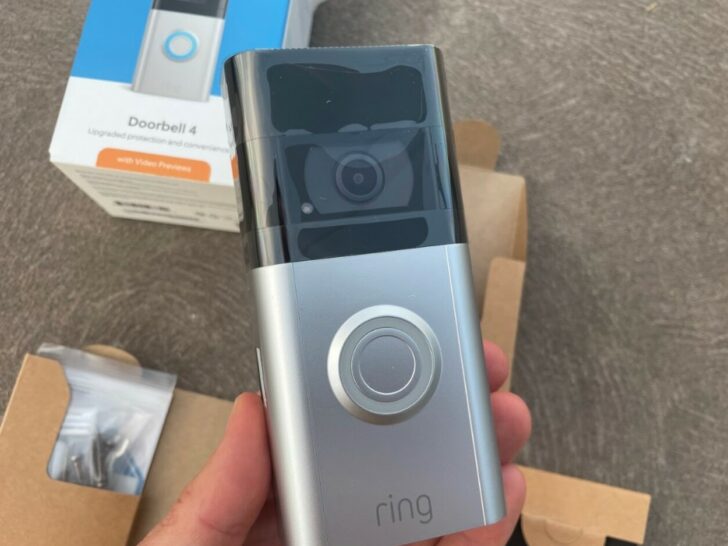
If you’ve been thinking about installing a Ring doorbell, you may wonder, “What drill is needed for a Ring doorbell?” Are you searching to drill into wood or masonry? Will you need special tools? And if so, what kind?
The Ring devices box no longer includes a drill bit. Some ring installation instructions for Ring devices are on the Ring Help Center page. These instructions advise drilling holes in your wall using a 1/4″ (6mm) drill bit to insert the provided wall anchors.
You may even wonder if you need to hire a professional or if you can handle the job yourself. We’re here to tell you that it all depends on the type of material your doorbell is mounted to.
In this article, we’ll explain what drill is needed for Ring doorbell and give you confidence that installing your doorbell isn’t as intimidating as it might seem!
By continuing to use this website you agree to our Terms of Use. If you don't agree to our Terms, you are not allowed to continue using this website.
What Do You Need to Install the Ring Doorbell?
First, you must ensure you have the right tools and supplies to complete the job correctly.
It’s a fairly simple process, but a few tools and materials are needed to install a Ring Doorbell. Here’s what you need:
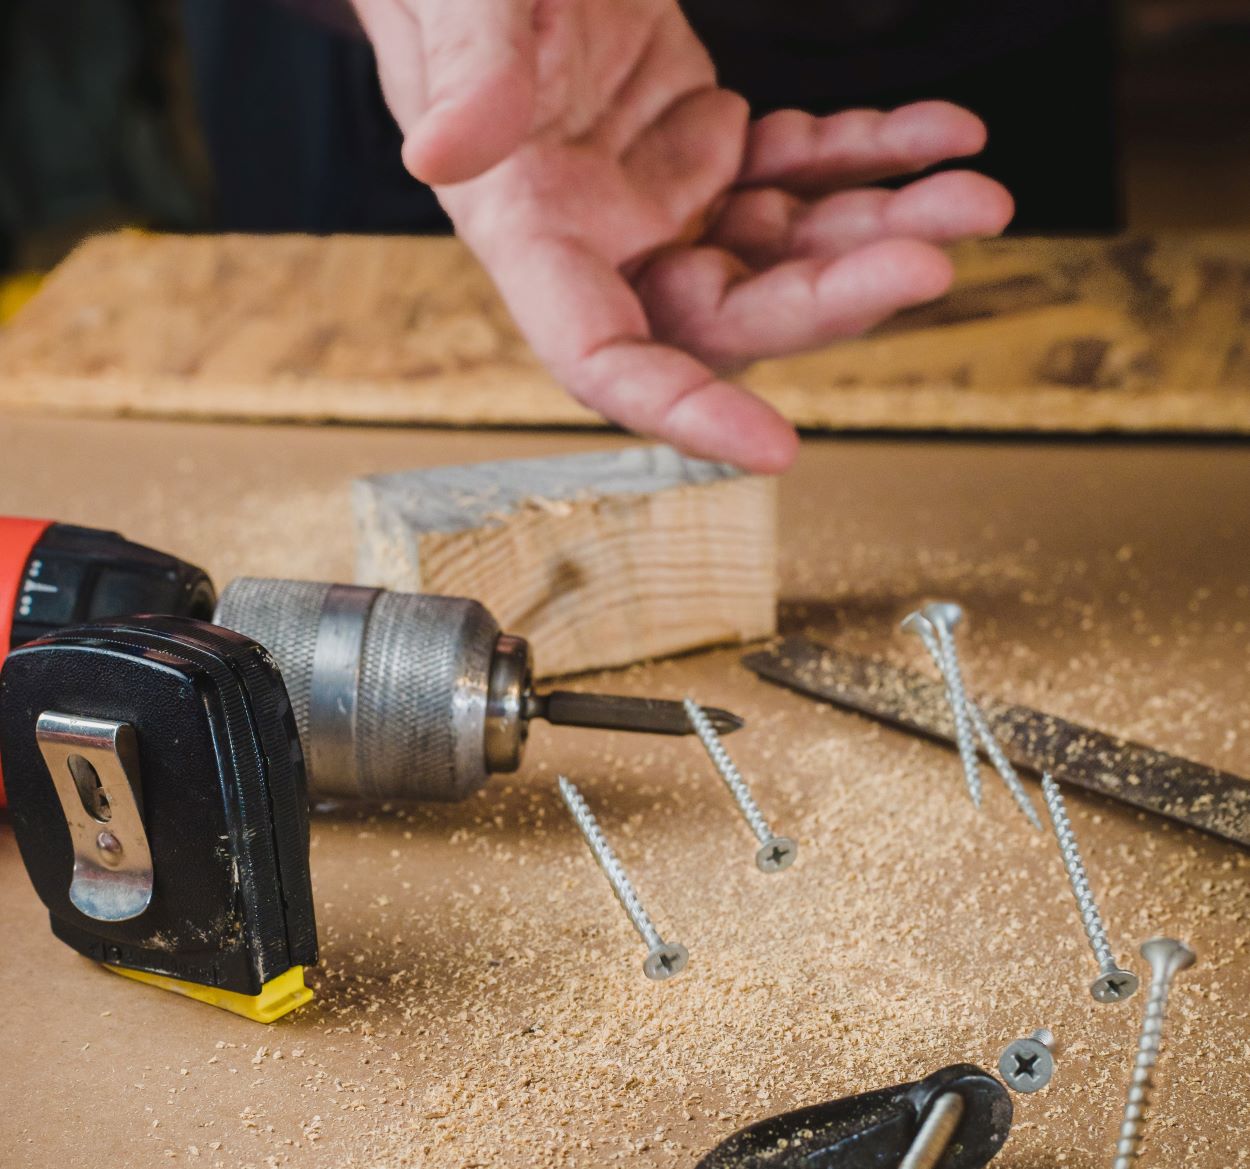
- Drill: To create holes in the wall where you’ll mount the doorbell.
- Tape Measure: To measure the distance between screws so they’re even and level on the wall.
- Level: To make sure your doorbell is level.
- Screwdriver: To secure the mounting plate to your wall with screws.
- Masonry bit (optional): If your home isn’t made of wood or siding, then you’ll need a masonry bit for drilling into concrete, stucco, or brick walls.
What Type Of Drill Is Needed For Ring Doorbell Installation?
If you want to install a Ring Doorbell, you should know a few things. First off, you’ll need the right drill and drill bits. Luckily, the process is not too complicated, and various options depend on your doorbell type.
No matter which doorbell you have, a wired or a wireless one, you will likely need a drill to complete the installation process. Generally speaking, it’s best to use an electric screwdriver or manual screwdriver as they are easier to use when drilling into hard surfaces like concrete or brick.
However, an electric drill may be required for more secure mounting if your house has plaster walls (common in older homes).

When choosing a drill for Ring doorbell installation, make sure it has variable speed settings to choose the most appropriate speed for boring holes in different surfaces like concrete, stone, and stucco.
Additionally, invest in good quality drill bits because dull or rusty bits can cause permanent damage to your walls and be dangerous during operation.
When Should You Use A Masonry Bit for Your Drill For Ring Doorbell Installation?
If you have a solid surface doorbell installation, a masonry bit is recommended. This type of drill bit is specifically designed for drilling into harder materials such as concrete, brick, and stone. It has a sharp tungsten carbide tip and is heat-treated to enhance strength.
Here are some cases where you should use a masonry bit when installing your Ring Doorbell:
- If your doorbell is installed on a concrete wall.
- If your doorbell is installed on brick or stone walls/surfaces.
- If you’re unsure what material your wall is made from, it’s best to err cautiously and use the masonry bit for safe measure.
Since masonry bits are designed for extra hard surfaces, it’s the most reliable option to ensure the drill gets through any material that could be in your way during installation. Even if it turns out that you don’t need to use the masonry bit for your specific installation, it won’t hurt to have it around, just in case!
How to Mark The Holes For Drilling In Your Wall?
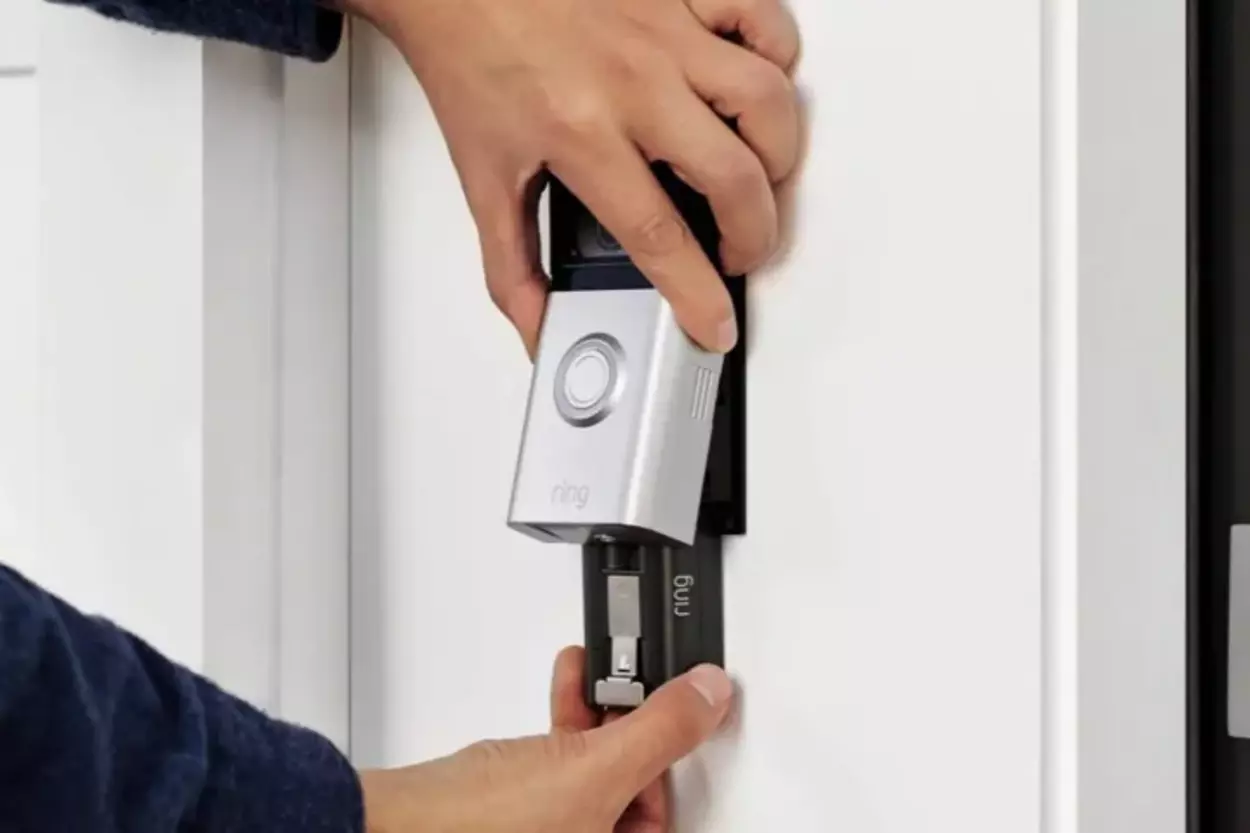
Marking the holes for drilling in your wall is the next step after you have selected the correct drill for your Ring doorbell. To do this, it is important to know about the two mounting plates available with your Ring or other doorbell systems and how to use them most effectively.
Selecting Your Mounting Plate
The two mounting plates are the standard and masonry plates. The standard plate has a slot on each side that lines up with the holes on the back of your Ring doorbell. Meanwhile, the masonry plate is designed for use on harder surfaces like brick, stucco, or concrete, and it has more slots than the standard plate.
Making Your Marks
Now that you have chosen which plate to mount your Ring doorbell, you can begin marking where to drill into your wall. If you are using a standard plate, line up its slots with pre-drilled holes in your wall and mark each side of each slot with a pencil or marker so that you know exactly where to drill.
If you are using a masonry plate, line it up in your desired spot and mark its slots with a marker or pencil as well.
Remember: when marking each slot, keep in mind the mounting plate will cover it after installation, so make sure not to mark too close to it! That’s all there is to know about marking up and drilling into walls to mount a Ring doorbell – easy enough, right?
What Extra Accessories Are Helpful When Drilling Into Your Wall?
When drilling into your wall to mount a Ring Doorbell, you’ll need extra accessories beyond just your drill. This gear will make the job easier, and could make the difference between a secure and sloppy install job.
Here’s a list of some of the accessories you should consider picking up:
- Hex Head Screws: Hex head screws are great for securing the doorbell in place once it’s mounted to your wall. They’re also much harder to tamper with than standard screws.
- Level: A level is essential for ensuring that your doorbell mounts evenly and remains level when you attach it to the wall with anchors and screws.
- Drill Bits: The type of drill bit you use depends on what material your siding is made out of (wood, brick, stone, or asphalt shingles). Be sure to double-check before getting started so that you don’t end up with the wrong drill bit size!
- Masonry Anchors: Once the hole is drilled, masonry anchors help keep the doorbell securely attached to any surface that’s not wood or fiber cement board. Make sure to get ones specifically designed for use outdoors since they’ll be exposed to the elements for many years!
- Caulk Gun: A caulk gun helps with filling in any gaps around where you installed your Ring Doorbell—this will ensure that water or bugs can’t get into the area around it and cause damage over time.
These are just a few of the many accessories that can make drilling into your wall for Ring Doorbell installation much easier and much.
Tips And Tricks On How To Install The Ring Doorbell With A Drill
If you’re wondering what drill is needed for Ring doorbell installation, the answer is a standard power drill with a Phillips head bit. A cordless model is ideal as it will give you more flexibility and control when drilling. However, if you don’t own a cordless drill, a corded one will work just as well in this scenario.
To install your Ring Doorbell with a drill, here are some tips and tricks to keep in mind:
1. Choose The Right Drill Bit
The standard size for the drill bit used to install your Ring Doorbell is 3/32” or 2.4 mm, but it’s best to double-check the size of your doorbell before buying one. Just make sure that whatever you buy is compatible with your doorbell model!
2. Use A Drill Stop
A drill stop is an attachment that helps ensure that you don’t drill too deeply or too shallowly into the wall. It’s especially helpful if you’re new to power drilling and don’t want to accidentally damage the wall or cause harm to yourself.
3. Wear Safety Equipment
It’s important to always wear safety glasses while using any power tools, and that includes a power drill! These are essential to protect yourself from flying bits of debris, dust and other particles that might be kicked up during the drilling process — not to mention pieces of material from within the wall itself.
These tips should help you feel more confident about installing the Ring Doorbell with a drill—so get out there and get started!
| Ring Doorbell Model | Required Drill Size | Additional Tools |
|---|---|---|
| Ring Video Doorbell | 3/32″ drill bit | Phillips screwdriver, level |
| Ring Video Doorbell 2 | 3/32″ drill bit | Phillips screwdriver, level |
| Ring Video Doorbell 3 | 15/64″ drill bit | Phillips screwdriver, level |
| Ring Video Doorbell Pro | No drilling required | Screwdriver, drill if mounting to brick or concrete |
| Ring Video Doorbell Elite | No drilling required | Screwdriver, drill if mounting to brick or concrete |

Interesting Facts of Ring DoorBell
- Ring pioneered the concept of smart video doorbells, allowing homeowners to see, hear, and speak to visitors remotely via their smartphone.
- This provides a layer of security and peace of mind, letting you know who’s at your door even when you’re not home.
- Ring offers a variety of doorbell models with different features, from basic video recording to advanced motion detection and night vision.
- Some models even integrate with smart home systems for additional functionality.
- Ring undeniably transformed the doorbell market, making it a central piece of the smart home ecosystem.
FAQs
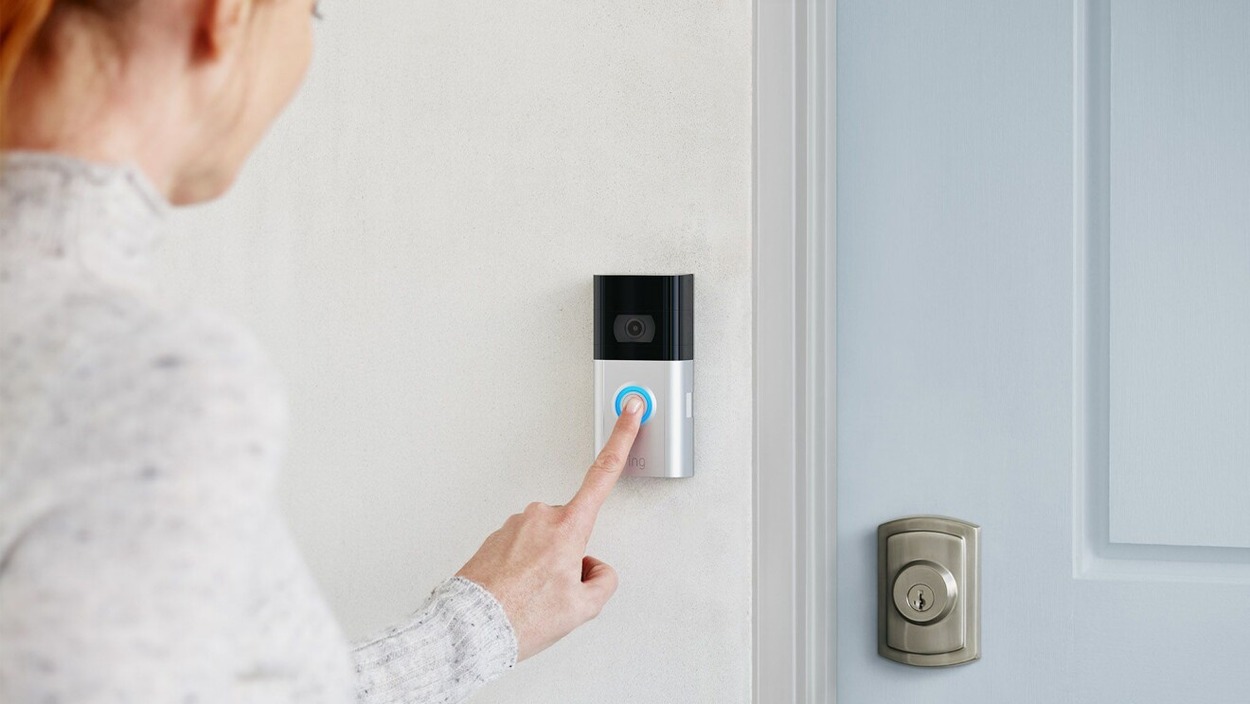
Do I Need To Drill Into My Wall To Install A Ring Doorbell?
It depends on the Ring Doorbell model and your specific installation requirements.
Can I Use Any Drill Bit To Install A Ring Doorbell?
Use the specific drill bit size recommended for your Ring Doorbell model to ensure proper installation. Using the wrong drill bit size may result in improper mounting or damage to the doorbell or wall.
Do I Need Any Additional Tools To Install A Ring Doorbell?
You may need a Phillips screwdriver and level to install your Ring Doorbell properly. If you are mounting the doorbell to brick or concrete, a drill and hammer may also be necessary.
It is important to refer to the specific installation instructions for your Ring Doorbell model to ensure you have all the necessary tools and equipment for installation.
Conclusion
- To sum up, installing your Ring doorbell is an easy and straightforward process, but it’s important to make sure you have the right drill bits and other tools for the job.
- With the right drill and screws, you can ensure your Ring doorbell is securely fitted and works as intended.
- When drilling, it’s important to ensure you’re drilling into the right material and the right depth, so don’t rush and double-check your work.
- Following these guidelines will help ensure a smooth installation process that won’t damage your Ring doorbell.
- With the right preparation, your Ring doorbell will be up and running in no time.