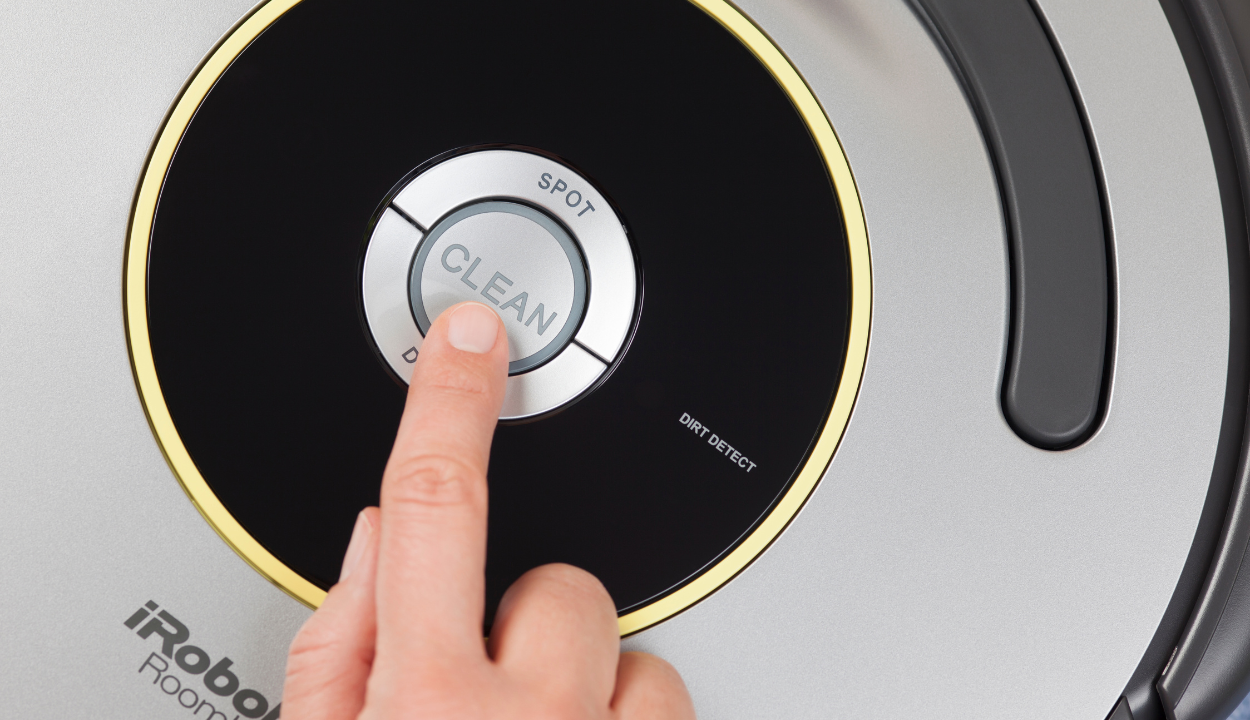
Error 34 on your Roomba is like a little hiccup in its communication system. Think of it as a moment when your Roomba has trouble talking to itself. No worries, though! Press the CLEAN button to give it a little nudge and restart its cleaning mission.
If the message keeps popping up, no stress! Give your Roomba a little break by performing a reboot. It’s like a quick power nap for your robot. After the reboot, if the error is still hanging around like an unwelcome guest, it might be time to bring in the professionals. Contact the friendly folks at iRobot Customer Care, and they’ll help you fix your Roomba. Happy cleaning!
Are you dealing with Roomba Error 34? Do you need help troubleshooting and resolving the issue? If so, you’re in the right place. Roomba Error 34 is a common issue that can cause your robotic vacuum to malfunction.
However, the good news is that it’s usually easy to troubleshoot and resolve. In this blog post, we walk you through the steps you should take to figure out what’s causing Roomba Error 34 and how to fix it.
We’ll start by explaining what Roomba Error 34 is and why it happens. Then, we’ll review the most common problems causing your error so you know where to look first. Finally, we’ll conclude with some tips for troubleshooting and resolving other Roomba errors. By following these steps, you should be able to get your robotic vacuum up and running again in no time!
What Is Roomba Error 34 and (What Does It Mean?)

If you’re a Roomba owner, you may have recently encountered your device’s dreaded error code 34. Don’t panic; it’s a common problem that can be easily rectified.
Error 34 occurs when the Roomba cannot contact its home base or can’t connect with the home base to be restored to its original settings. Generally, something interferes with the device’s connection, such as an object blocking it from connecting with its home base or a faulty power cord. It can also indicate a software issue with your Roomba that has caused it to stop functioning properly.
To troubleshoot Error 34 on your Roomba:
- First, restart your Roomba by pressing and holding its Clean button for 10 seconds and then releasing it.
- Then, try moving the device closer to its home base and check if the light ring on top turns solid green. If not, inspect the power cord for any signs of wear or damage.
- Also, ensure that any obstructions, such as furniture or anything else blocking the device’s path, have been moved out of the way and that none block it from contacting its home base station.
- Finally, if these steps don’t help, reset your Roomba by pressing and holding both its CLEAN and SCHEDULE buttons for 10 seconds until you see all four corners of the robot’s light ring pulsing yellow in sequence. This will reset your Roomba to factory settings, which should completely fix the Error 34 code.
Possible Causes of Roomba Error 34
Don’t panic if you see “Error 34” on your Roomba. It’s a fairly common issue with easy fixes. To troubleshoot and resolve the error, there are a few steps you can take:
- Check the Bin: Empty the bin and re-insert it to see if that corrects the error. Make sure it is properly in place and correctly connected to the robot.
- Check for Obstructions: Make sure no objects are blocking the sensors or preventing your Roomba from completing its cleaning cycle. Additionally, check for broken parts or wheels hindering your Roomba’s movement.
- Restart & Reset: If all of these fail, resetting the machine may be required. To do this, turn off the Roomba before unplugging it from power and then plugging it back in after around 10 minutes. You should restart your home’s Wi-Fi connection to ensure a strong signal when using your Roomba with Home App connectivity.
If these steps don’t clear up Error 34, consider contacting customer service for additional help and support.
How to Reset Your Roomba to Resolve Error 34

If resetting your robot hasn’t already resolved Error 34, there are a few more steps to take. Here’s what you need to check:
Test the Vacuum
First, test the vacuum by taking off the dust bin and cleaning the dust bin filter. Additionally, check if your brushroll is rotating freely when you reach inside the dustbin area. Make sure that it’s not blocked by any debris or dirt.
Clean the IR Bumpers and Sensors
If everything checks out with the vacuum, turn your Roomba over and inspect both sides for any blockage on the IR bumpers and sensors. Remove any hair or debris that’s blocking these parts from functioning correctly.
Check for Low Battery Power
Lastly, make sure that your unit has enough charge in it to continue cleaning. Low battery power can result in Error 34 messages as well. If all other components seem to be in working order but your Roomba is still displaying Error 34, try charging it for at least a couple of hours before trying again.
Cleaning Your Roomba’s Cliff Sensors to Fix Error 34

A Roomba Error 34 usually means that the Cliff Sensors are malfunctioning. Fortunately, there is a way to troubleshoot and fix this issue.
In order to restore your Roomba’s Cliff Sensors, you need to follow these steps:
- Take your Roomba outdoors and shake out any debris from its Cliff Sensors.
- With a clean, dry cloth or brush, carefully remove any visible dirt or dust from the sensors.
- Inspect the sensors for signs of damage or wear and tear. Replace them if needed.
- With a soft-bristled toothbrush and soapy water, gently scrub the Cliff Sensors to remove any stubborn residue or build-up on them.
- Rinse off the sensors with clean water and dry them thoroughly with a soft cloth before reassembling your Roomba.
This is an easy and effective way to restore your Roomba’s Cliff Sensors and get back to cleaning with minimal trouble!
Checking for Blockages or Debris Causing Error 34
If you’ve ruled out basic issues such as the Roomba’s batteries being low or the power adapter not being plugged in, then the next step is to ensure there aren’t any unusual blockages that may be preventing your Roomba from working properly.
Here are a few simple steps to help you check for blockages:
- Remove the dust bin and check for any debris or blockages inside of it. Be sure to also check the filter behind where the dust bin sits and make sure it’s clean.
- Check the brush area on your Roomba and make sure there isn’t any debris or items stuck there. This can include long strands of hair, strings, rubber bands, etc.
- Check the wheels of your Roomba, as they can often become blocked with dirt or debris that can prevent them from turning properly and cause an Error 34 message to appear.
- Check around your entire home for any other items that may be stuck in a corner or crevice that might be blocking your Roomba from accessing certain areas on its cleaning path.
- Finally, make sure your Roomba’s battery is charged – if its battery is too low it may not have enough power to detect obstacles in its way and trigger Error 34.
By taking all of these steps, you should hopefully be able to identify what is causing Error 34 on your Roomba and get it back up and running!

Other Tips to Troubleshoot Roomba Error 34
If the troubleshooting steps described above do not resolve Roomba Error 34, there are a few other tips to try.
Clean Out Roomba’s Wheels & Brushes
Error 34 may be caused by dirt or debris lodged in your Roomba’s wheels and brushes. Check that both of these are clean and free of any blockages that might be impeding their movement.
Reset Roomba’s Motor
If even after cleaning the wheels and brushes your Roomba is still showing Error 34, you may need to reset the motor. To do this, press and hold the Spot and Dock buttons simultaneously for 10 seconds. This will restart the motor, allowing it to run its cleaning cycle smoothly again..
Replace or Repair Roomba Battery
If you have exhausted all of the troubleshooting tips listed above and your Error 34 persists, it may be time to consider replacing or repairing your battery. Contact iRobot for suggestions on how you can go about doing this.
| Description | Troubleshooting Steps |
|---|---|
| 1 | Move the Home Base® to an open area with no obstructions. |
| 2 | Check the power source for the Home Base®. Make sure it is plugged in and receiving power. |
| 3 | Check the Roomba’s charging contacts and clean them if necessary. |
| 4 | Power cycle the Roomba by pressing and holding the CLEAN button until the light ring turns off, then release the button. |
| 5 | Reset the Roomba’s Wi-Fi connection by removing it from the app and setting it up again. |
| 6 | Contact Roomba customer support if the issue persists. |
Minimizes the amount of cleanup required before cleaning begins by locating and avoiding obstructions like pet feces and cables. For a maximum of sixty days, the Roomba Combo® j5+ self-empties. Vacuum carpets and hard surfaces; the extra mopping bin uses No Mop Zones to exclusively clean hard floors. – irbot.com
FAQs
What does Roomba Error 34 mean?
Roomba Error 34 means that the Roomba is unable to connect to the Home Base®. This can happen due to various reasons such as obstruction in the path of the Home Base®, power source issues, or connectivity problems.
How can I fix Roomba Error 34?
To fix Roomba Error 34, you can try moving the Home Base® to an open area, checking the power source for the Home Base®, cleaning the Roomba’s charging contacts, power cycling the Roomba, resetting the Roomba’s Wi-Fi connection, or contacting Roomba customer support if the issue persists.
Can Roomba Error 34 occur even if the Roomba is working fine? No, Roomba Error 34 occurs only when the Roomba is unable to connect to the Home Base®. If the Roomba is working fine and is able to connect to the Home Base®, you should not encounter Error 34.
Conclusion
- Error 34 can be a hassle, but with a few troubleshooting steps, you can solve the issue and get your Roomba back in working order. The most important thing is to make sure there are no obstructions blocking your device’s path. Additionally, checking the power supply and cleaning the sensors can help prevent future errors from occurring.
- By understanding how to troubleshoot and resolve Roomba Error 34, you can make sure your Roomba keeps your place spick and span. Taking the time to go through the proper steps to diagnose and fix the error can save you time and frustration in the long run.

