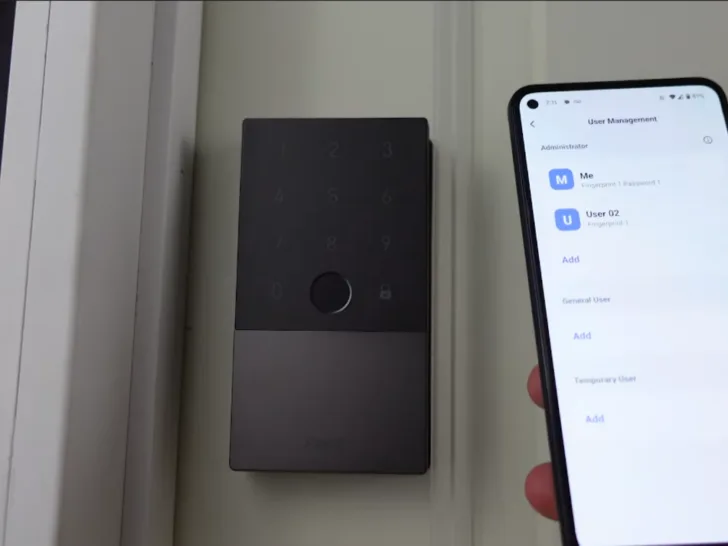
Like everyone else, I also stay concerned about the safety of traditional home locks, which led me to consider switching from traditional door locks to modern, technological alternatives.
Having experimented with smart locks previously, I was aware of their convenience, but the Aqara Smart Lock immediately stood out. Its promising security features and user-friendly design got my interest.
Installing an Aqara Smart Lock involves downloading the Aqara Home app, checking door compatibility, and mounting the interior and exterior units following the user manual’s instructions. Aqara provides online resources and video tutorials to guide you through the process. For complex installations, consider seeking help from a professional locksmith.
In this review, I’ll share experiences with the Aqara Smart Lock, shedding light on how it addresses safety concerns and simplifies daily life with its modern features.
| Installation Steps | Details |
| Door Measurements | – Hole diameter: 54 mm – Hole position: 70 mm from door edge – Door width: 35 to 50 mm |
| Deadbolt Installation | – Thread tailpiece cable through the door – Attach mounting plates and opposite-pull screw |
| Outer Panel Connection | – Thread tailpiece cable through door – Attach mounting plates and opposite-pull screw |
| Checking Lock Operation | – Rotate the tailpiece to check smooth operation – Adjust if any resistance or jamming occurs |
| Inner Panel Installation | – Remove the inner panel battery cover – Remove the knob cover – Connect cables – Insert tailpiece – Secure the inner panel to the mounting plate with screws |
| Final Checks | – Confirm smooth locking/unlocking – Adjust lock body and mounting plate as needed – Verify operation with key |
| Completion | – Ensure all components are secure – Verify battery installation – Voice prompt signals installation completion |
By continuing to use this website you agree to our Terms of Use. If you don't agree to our Terms, you are not allowed to continue using this website.
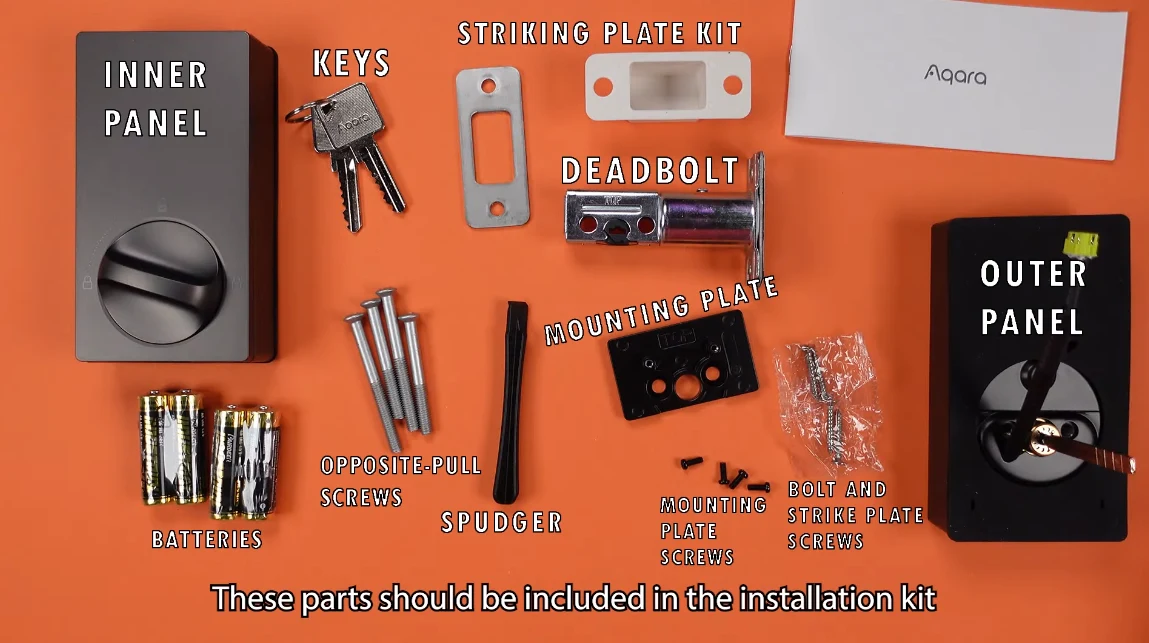
Aqara Smart Lock Installation Kit
The Aqara Smart Lock installation kit includes a range of essential components to ensure a successful installation:
- Inner Panel: This component is important for the interior side of the door and contains the necessary mechanisms for the smart lock’s operation.
- Keys: Traditional keys are included for manual unlocking and backup.
- Striking Plate: The striking plate is used with the deadbolt to secure the door when the lock is engaged.
- Deadbolt: The deadbolt is the central locking mechanism of the smart lock, which extends into the door frame when locked.
- Batteries: Batteries are provided to power the smart lock, ensuring its functionality.
- Opposite Pill Screws: These screws are used for various installation purposes and securing the components.
- Spudger: A spudger is a handy tool for prying and using components during installation.
- Mounting Plate Screws: These screws are essential for attaching the mounting plate to the door.
- Bolt and Strike Plate Screws: These screws are used to secure the striking plate and the deadbolt.
- Outer Panel: The outer panel is the visible part of the smart lock on the exterior side of the door.
- Guide: A guide may be included to assist in the installation process, providing step-by-step instructions.
Aqara Smart Lock Installation Steps
Installing the Aqara Smart Lock (U100) involves precise steps to ensure a secure experience. Here, we’ll walk you through each stage of the installation process, from measuring your door to the final checks and completion.
Door Measurements
Accurate door measurements are fundamental for a successful installation. To ensure the lock’s proper fit:
- The hole within the door for the lock should precisely measure 54 millimeters.
- Position this hole at 70 millimeters from the door’s edge.
- The door’s width must fall within 35 to 50 millimeters.
Deadbolt Installation
The deadbolt serves as the main part of the smart lock, and its installation is necessary:
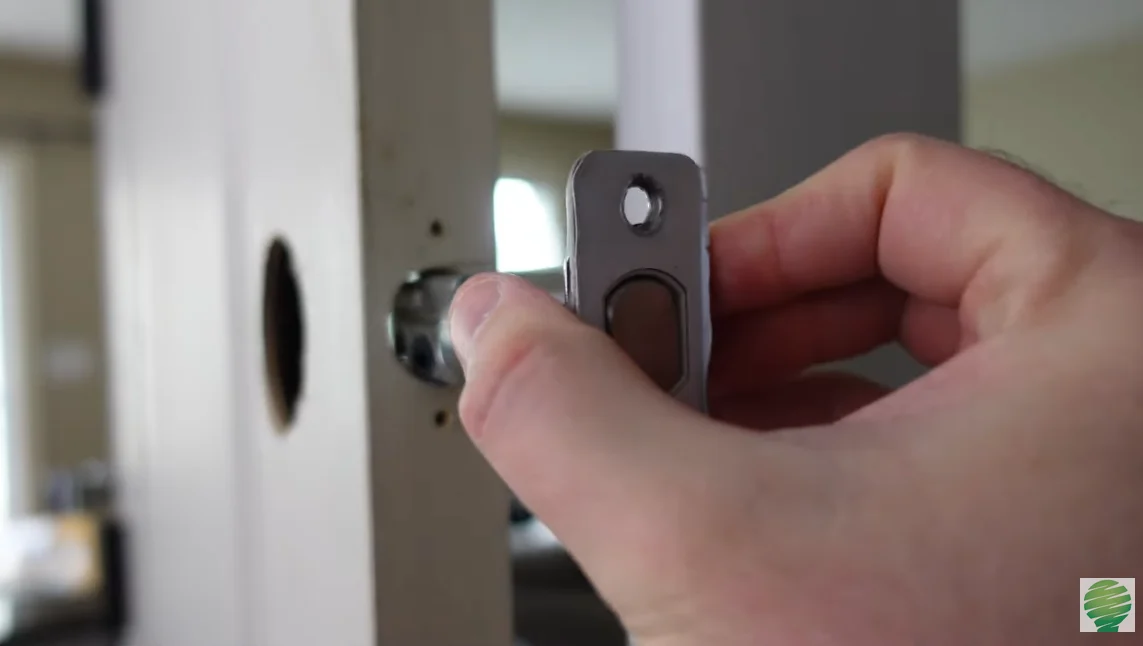
- Gently insert the deadbolt into the hole at the door’s edge.
- Place the striking plate on the exposed side of the deadbolt.
- Ensure that the striking plate aligns perfectly with the plate and secure it in position using screws.
Outer Panel Connection
The outer panel comprises the visible part of the smart lock and links with the interior components:
- Thread the tailpiece cable from the outer panel connector through the deadbolt inside the door.
- Affix the mounting plates and opposite-pull screw on the outer panel’s opposite side.
Checking Lock Operation
After installation, it’s imperative to verify the lock’s operation:
- Rotate the tailpiece to check its locking and unlocking function without any jamming.
- If any resistance is encountered, ensure the tailpiece is centered within the mounting plate opening, and all components are correctly positioned without obstructions.
Inner Panel Installation
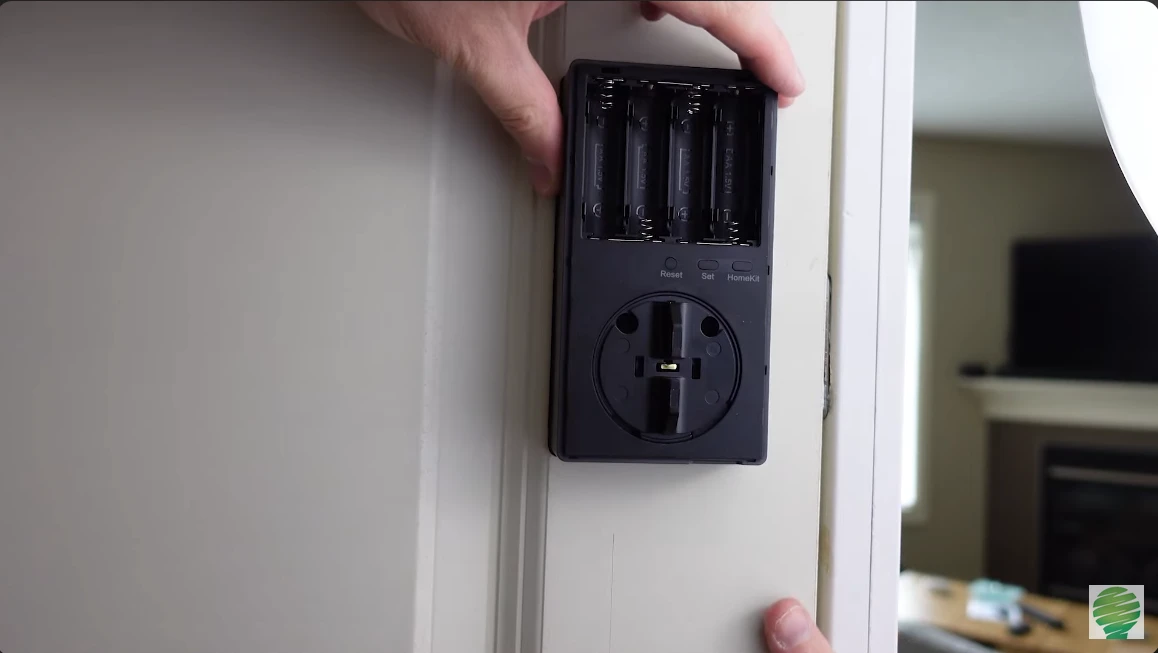
The inner panel, located on the interior side of the door, connects to the outer panel:
- Remove the battery cover on the inner panel.
- Utilize the provided tool to remove the knob cover.
- Establish the connection by linking the outer panel’s cable to the socket on the inner panel.
- Insert the tailpiece into the thumb-turn shaft on the inner panel.
- Confirm that the tailpiece is in the horizontal unlocked position.
- Secure the inner panel to the mounting plate indoors using the included screws.
Final Checks
Before concluding the installation, perform several essential checks:
- Confirm that the locking and unlocking processes are smooth.
- Address any stiffness by adjusting the positioning of the lock body and the mounting plate to achieve proper alignment.
- Slide open the front lock cover and verify that the lock can be effectively locked and unlocked using a key.
Completion
Upon successfully following all the installation steps, you’ve reached the completion phase:
- Ensure that all components are securely positioned.
- Double-check the correct installation of the battery.
- A voice prompt will signal the completion of the installation.
Aqara Application Setup
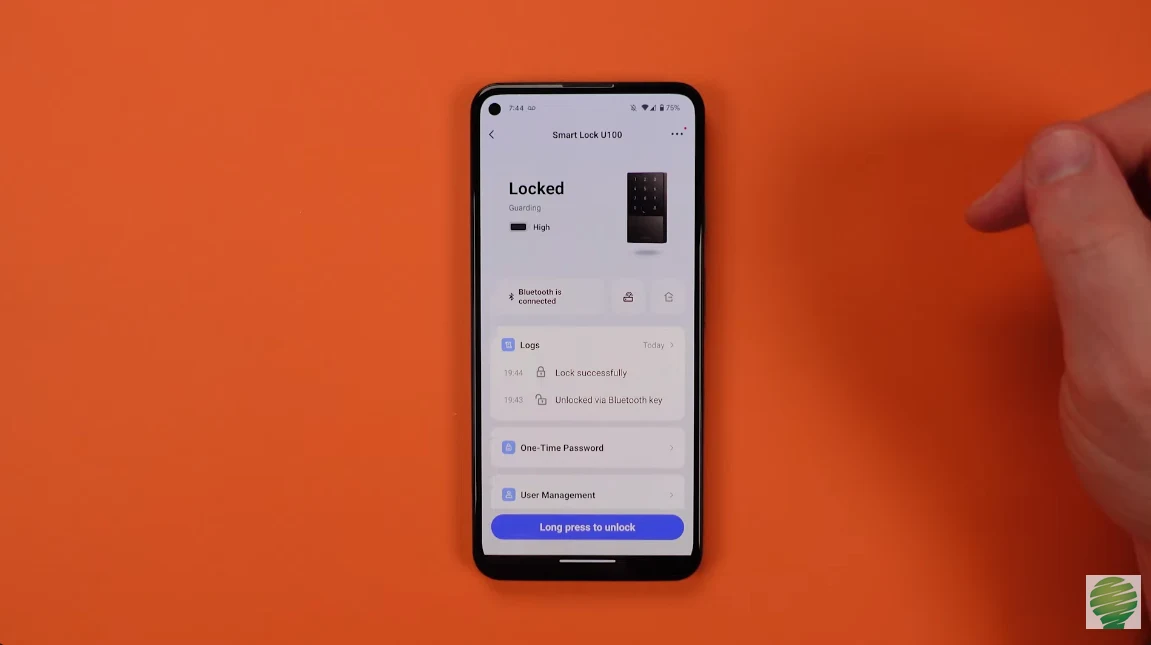
Setting up the Aqara Smart Lock through the Aqara App is an easy process that brings convenience to your home security. Let’s break down the steps in a simple manner:
Opening the Aqara App
First, you must open the Aqara App on your smartphone or tablet. This is the central hub for managing your smart devices. It’s like your remote control for your smart lock and other smart gadgets.
Adding the Smart Lock
Once inside the Aqara App, you want to add your smart lock. Here’s how:
- Look for the “Add accessory” page. This is where you tell the app you want to add a new device, in this case, your Smart Lock U100.
- Make sure your device’s Bluetooth is enabled on your smartphone or tablet.
Setting up Administrator Password
Now, let’s set up your administrator password. This is like the master key to your smart lock:
- Approach your smart lock while you’re in the app. You want to be close to it so it can receive your commands.
- The app will ask you to enter a six-digit password. This is your secret code to control your lock. Remember, keeping this password in your memory is crucial, as it can’t be recovered if forgotten.
Adding Fingerprint Registration
One of the cool features of your Aqara Smart Lock is that you can add fingerprint recognition:
- In the app, you’ll find the option to add fingerprint registration. It’s like teaching your lock to recognize your unique fingerprint.
- The great thing is that you can change or update your registered fingerprints later if needed. The app makes it easy for you.
- Your smart lock is smart enough to detect the direction you’re locking the door. It knows whether you’re locking it from the inside or outside.
Door Lock Calibration
Your smart lock needs to be calibrated to work perfectly:
- The app will guide you through door lock calibration. It’s like setting up a reference point for your lock to know when and when it’s locked.
- The calibration process is explained in the app, and it’s easy to follow. It ensures your lock operates accurately.
Final Verification
Before you wrap things up, here are the final steps:
- Lock and unlock your door using the app. This is the moment to verify that your smart lock is working as expected. Test it a few times to be sure.
- Try using the administrator password you set up earlier. Ensure that it opens and locks the door without any issues.
- If you’ve added fingerprints, give them a try, too. Your lock should recognize them, allowing you to unlock the door effortlessly.
Interesting Facts about Aqara
- Award-Winning Designs: Aqara’s sleek and user-friendly product designs have received recognition. They’ve won prestigious awards like the Red Dot and iF Design awards.
- Wireless Installation: Many Aqara devices are battery-powered and utilize wireless communication protocols. This eliminates the need for complex wiring during installation, making them renter-friendly.
- Wide Range of Applications: Aqara’s product range caters to various needs. Create automation routines, improve security, monitor your environment, or simply control lights and appliances remotely – Aqara offers solutions for diverse smart home goals.
- Community and Support: Aqara fosters a community of users and enthusiasts. You’ll find online forums, user guides, and active customer support to assist you with your Aqara products.
- Constant Innovation: Aqara is a frontrunner in smart home technology with continuous product development. Stay ahead of the curve with Aqara’s commitment to innovation in the ever-evolving smart home landscape.
If you want a detailed visual guide, then check out the video below:
What tools do I need to install N100 lock?
byu/ychw inAqara
FAQS
Can I install a smart lock myself?
Yes, you can install a smart lock yourself. Most smart locks are designed for DIY installation. Just follow the manufacturer’s instructions carefully, and you can have it up and running without professional assistance.
How do I add the Aqara smart lock to HomeKit?
To add your Aqara Smart Lock to HomeKit, open the Aqara Home app, go to the “Smart Lock” page, access “General Settings,” and select “Bind with HomeKit.” Scan or input the HomeKit setup code inside your lock’s battery compartment cover, following the app’s prompts. This integration enables HomeKit functionality.
What is the battery life of Aqara smart door lock?
The Aqara smart door lock has a battery life of approximately 18 months. This means you won’t need to change the batteries frequently, providing long-lasting security and convenience. Be sure to replace the batteries when needed to ensure the lock’s continuous operation.
The Final Say
- Accurate door measurements ensure a perfect fit, ensuring the lock operates as intended and fits various door sizes.
- The deadbolt insertion and securing process is straightforward, eliminating jamming issues and ensuring smooth locking and unlocking.
- The Aqara App simplifies the setup and management of the lock, offering an intuitive interface that streamlines the user experience.
- Including fingerprint recognition adds a layer of convenience and security, with the flexibility to update registered fingerprints.
- The lock’s ability to detect the locking direction provides extra security, bolstering home protection.
- The final verification step instills confidence in the lock’s reliability, ensuring it works as expected.

