
Getting Started with Homey Moods
To access Moods, you need either a Homey Pro Hub 2023 or a premium subscription to the Homey app. If you’re using an older Homey Pro 2019, an update will be available soon, although it will come with a small fee.
Setting Up Homey Moods
The setup process for Homey Moods is straightforward. Here’s a step-by-step guide to getting started:
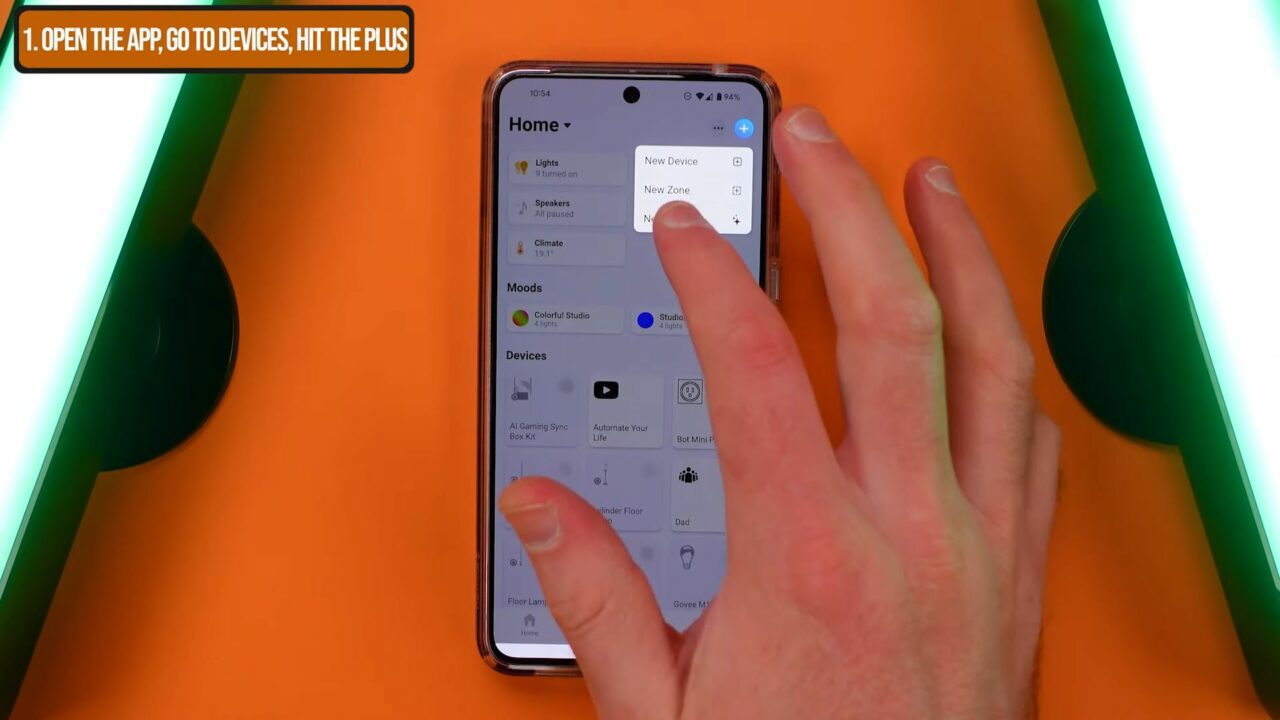
- Open the Homey App: Launch the Homey app on your smartphone or tablet.
- Navigate to the Devices Page: Tap on the devices icon to access the devices page.
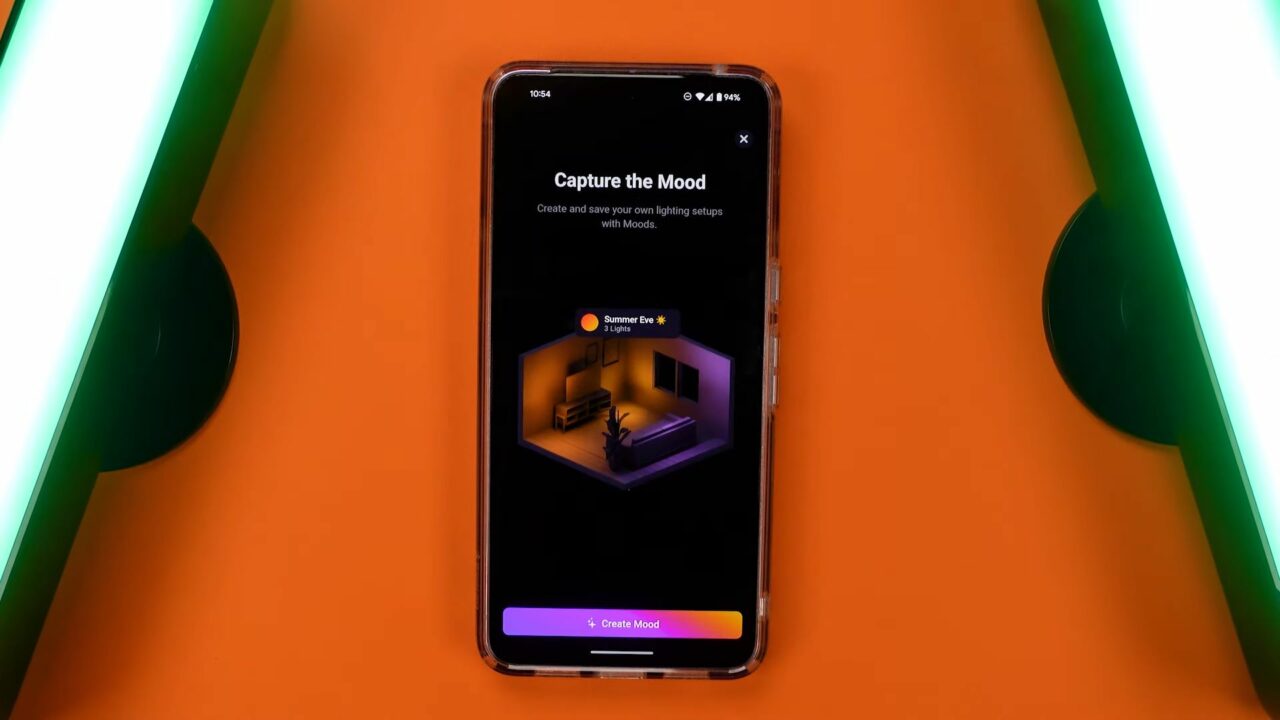
- Add a New Mood: Click the plus button (+) to add a new mood. If the option to add a mood isn’t visible, you may need to update your Homey hub.
- Select Your Lights: Choose the lights you want to include in your new mood. Ensure you select the lights you wish to turn off as part of this step.
- Customize Your Mood: Adjust the brightness levels and colors for each light. Turn off any lights that should not be active in this mood.
- Name and Save: Once you’re satisfied with your settings, give your mood a name that reflects its theme or purpose and save it.
Creating and Customizing Your First Mood
For my first mood, I decided to create a Forest theme, which is perfect for those times when you need to feel connected to nature without stepping outside. Homey offers a variety of pre-created themes to choose from, which makes it easy to get started.
Here’s how I customized my Forest mood:
- Choose a Pre-Created Theme: Homey provides many themes that can be selected and tweaked to your liking. This is a quick way to create a mood.
- Set the Mood: One of Homey’s neat features is the ability to save the current state of your lights. This means if you have your lights set to specific colors and brightness levels, entering the mood creation process will capture and save this exact setup.
- Fine-tune the Settings: Adjust the brightness for each light, and decide which lights should turn off when the mood is activated. This ensures that the ambiance is just right.
- Name and Save: Finally, give your mood a descriptive name, such as “Forest Retreat,” and save it.
Exploring the Benefits of Homey Moods
Homey Moods offers several advantages:
- Easy Access: Once created, moods can be quickly accessed and activated from the Homey app.
- Voice Control: Moods are integrated with Amazon Alexa and Google Assistant, allowing you to control them with voice commands.
- Automations: Moods can be incorporated into your Homey automations, making it easy to create complex lighting scenarios with minimal effort.
Dynamic Features and Common Questions
While Homey Moods brings a lot of functionality, you might have a few questions about its capabilities, such as:
Can you create dynamic moods with changing colors?
By default, Moods in Homey do not support dynamic color changes. However, I’ve found a workaround to achieve dynamic lighting effects, which I’ll explain in detail below.
Can moods be assigned to specific rooms?
Yes, but moods are assigned to the room that is the lowest level in your hierarchy. For instance, my Forest mood joined the main level room, which encompasses all the selected lights.
Can moods be edited and managed via the web app?
Currently, moods cannot be edited in the web app, but they can be triggered from there.
Extending the Functionality of Homey Moods
One of the standout features of Homey Moods is their integration into automations. Here’s how you can maximize their use:
Using Moods in Automations
- Trigger Automations: Any time a mood is activated, it can trigger an automation. Conversely, any automation can activate a mood.
- Voice Assistant Integration: Moods synchronize with Amazon Alexa and Google Assistant, allowing you to control them through voice commands.
- Centralized Control: Using moods within your automations simplifies the process, as you won’t need to set up individual lights each time.
Advanced Automation with Homey Moods
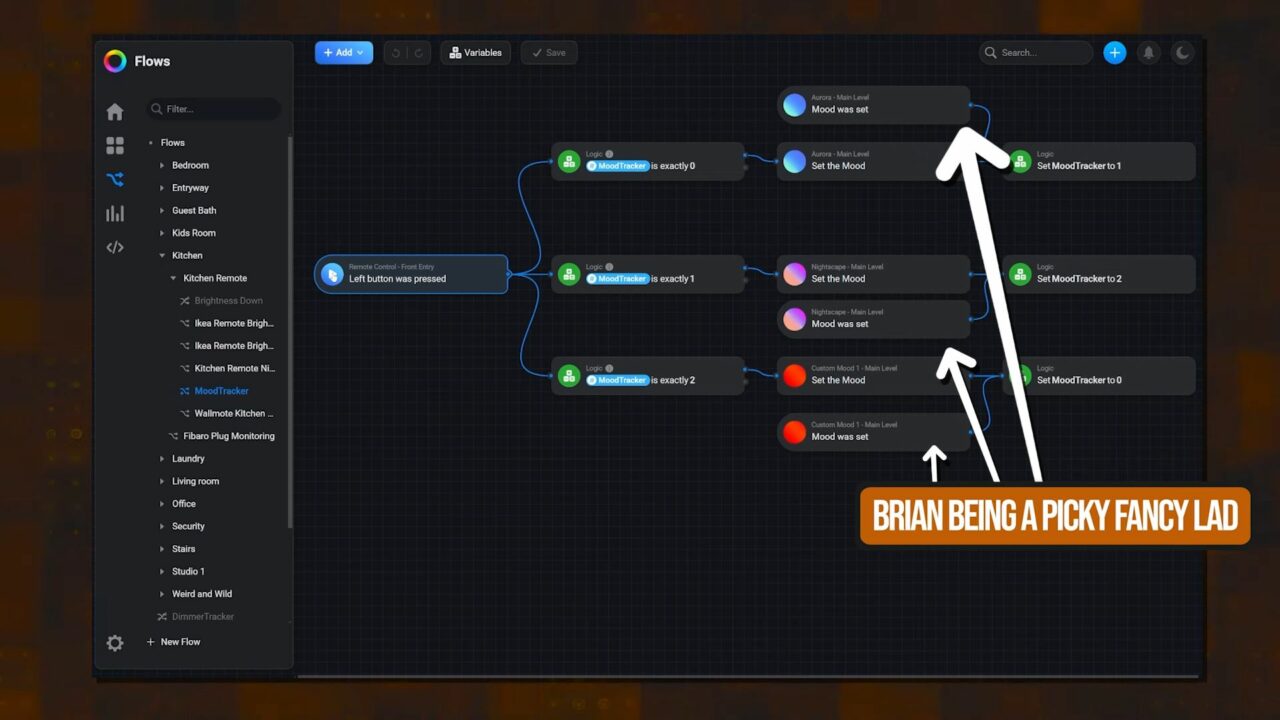
To illustrate the power of Homey Moods, let me share a trick I used with an Ikea remote to cycle through different moods in my living room. Here’s how I did it:
- Create a Variable: I created a variable called mood tracker that changes the value with each button pressed on the Ikea remote.
- Set Up the Automation: I set up an advanced flow automation that switches to a different mood based on the value of the mood tracker variable.
- Track Mood Changes: I ensured that every time a mood is turned on, it’s tracked correctly. This step is optional but ensures seamless operation.
Adding new moods to this setup is straightforward. For example, to add my new Forest mood, I simply made a few modifications to the existing flow.
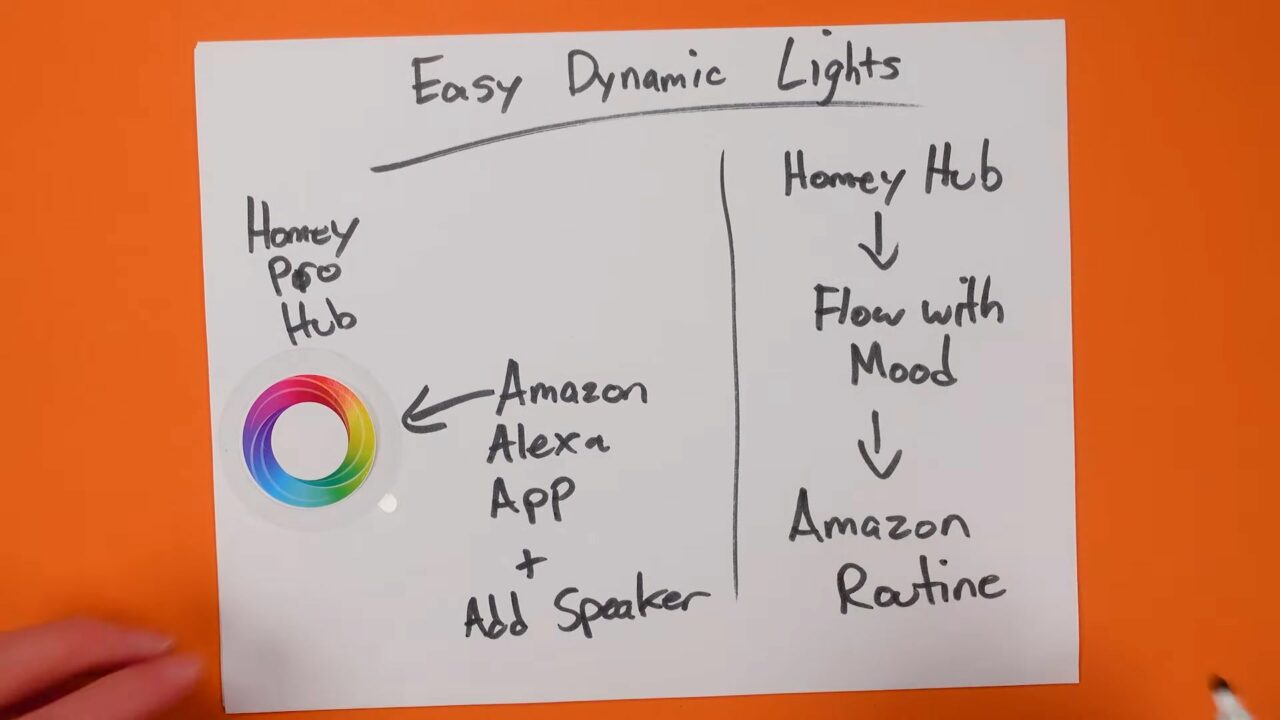
Creating Dynamic Effects
Although Homey Moods doesn’t support dynamic effects by default, I managed to create dynamic lighting using Govee lights and the Amazon API.
Here’s how you can do it:
- Install the Amazon Voice Assistant App: I installed an app on my Homey Hub to connect with Amazon’s voice assistant.
- Add Echo Speakers to Homey Pro: I added my Echo speakers to Homey Pro, allowing access to routines created in Amazon’s app.
- Create Routines: I set up routines in the Amazon app that utilize the dynamic effects of Govee lights.
- Sync with Homey: By integrating these routines with Homey, I can achieve dynamic lighting effects that sync with my moods.
Conclusion
- To fully experience Homey Moods, you’ll need the Homey Pro Hub or a premium app subscription. If you’re considering purchasing Homey Pro, now is a great time.
- For those who need more information, check out our full beginner guide to Homey Pro.
- It covers the advanced flow system, building simple yet powerful automations, and creating a reliable smart home setup. Enjoy transforming your lighting experience and live smart!


Lucky you! This thread is empty,
which means you've got dibs on the first comment.
Go for it!