
Home security is a top priority for many people, and one of the most popular ways to keep your home safe is by installing an ADT security system.
ADT uses a variety of sensors and detectors to monitor your home and alert you in case of any potential threats. However, sometimes homeowners may want to remove certain ADT zones from their system.
But how exactly are ADT zones removed? In this article, we’ll dive into the process of removing ADT zones and what you should know before doing so.
| How to remove ADT Door and Window Sensors? | The process of removing the ADT sensors from your property is simple. ADT’s Command Panel and Pulse network simplify the process from start to finish. |
| Bypassing Zones Using Additional ADT Control Panels | To deactivate the relevant zone, most control panels demand a user code, followed by a number, and then a three-digit zone number. |
| Eliminating ADT Wireless Window and Door Sensors | Using a razor or knife, cut through the silicone lining with caution. At this stage, run a putty knife through the glue and fully remove the sensor. |
| How to Uninstall ADT Wired Window and Door Sensors? | Existing cables will need to be pushed back through the walls, but all other stages are the same. |
| Eliminating Wire-In Window and Door Sensors | Simply pull them out with your fingers or a screwdriver; the unconnected magnet will come out first, followed by the wires. |
| ADT Replacement Kits | A contact repair kit is available from ADT if you need to change out the sensors. |
By continuing to use this website you agree to our Terms of Use. If you don't agree to our Terms, you are not allowed to continue using this website.
ADT In Brief

ADT is a leading provider of home security systems and services in the United States and Canada. The company was founded in 1874 and has since grown to become one of the largest and most well-known home security providers in North America.
ADT offers a range of security products and services, including security cameras, burglar alarms, smart home automation, and 24/7 monitoring services.
The company’s security systems are designed to provide homeowners with peace of mind by protecting their homes and families from intruders and other potential threats. ADT has a reputation for providing reliable and high-quality home security solutions, and their systems are trusted by millions of homeowners across the United States and Canada.
How To Remove ADT Door and Window Sensors?
Removing ADT door and window sensors is a relatively simple process that can be done in just a few steps. Here’s how to remove ADT door and window sensors:
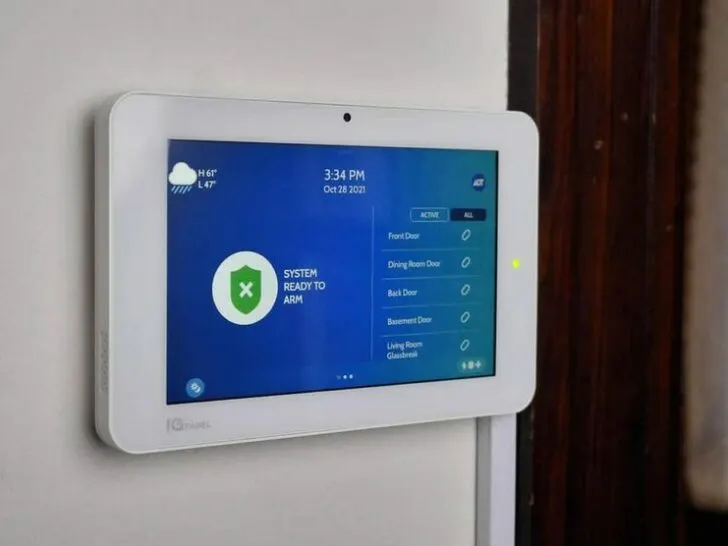
- Locate the sensor: Start by identifying the sensor you want to remove. ADT door and window sensors are typically small and rectangular, with one half of the sensor attached to the door or window and the other half attached to the frame.
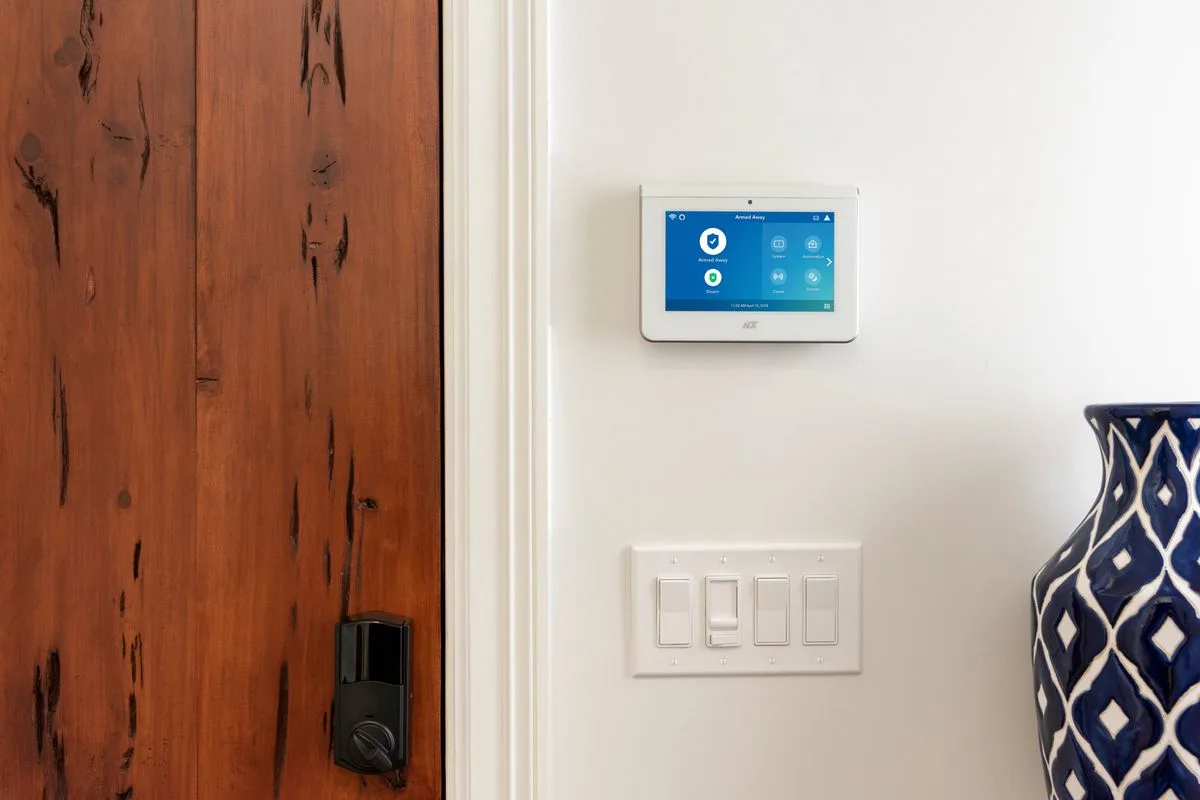
- Disarm the system: Before removing the sensor, you’ll need to disarm your ADT security system. You can do this by entering your security code on the control panel or using the ADT mobile app.
- Remove the cover: The sensor cover is typically held in place by clips or screws. Use a screwdriver or a flat tool to gently pry off the cover.
- Remove the battery: Once the cover is removed, you should see the battery inside the sensor. Carefully remove the battery by pushing it out or sliding it out of its compartment.
- Remove the sensor: With the battery removed, you can now remove the sensor from the door or window frame. Gently pull the sensor away from the frame to detach it.
- Clean up: After removing the sensor, you may notice adhesive residue or other debris left behind. Use a clean cloth or alcohol wipes to clean up any leftover adhesive or dirt.
It’s important to note that removing ADT sensors may affect the performance of your security system. If you’re unsure about removing sensors or making changes to your ADT system, it’s best to contact ADT customer support or a professional installer for assistance.
Bypassing Zones Using Additional ADT Control Panels
If you have additional ADT control panels installed in your home, you can use them to bypass specific zones in your security system. Bypassing zones allows you to temporarily disable a zone so that it does not trigger an alarm when you arm your system.
Here’s how to bypass zones using additional ADT control panels:
- Arm your security system: Start by arming your security system using your primary control panel. When you arm your system, any zones that are not bypassed will trigger an alarm if they are breached.
- Access additional control panel: Go to the location of the additional control panel that you want to use to bypass zones. The additional control panel should be connected to your ADT security system.
- Enter user code: Enter your user code on the additional control panel to access the main menu.
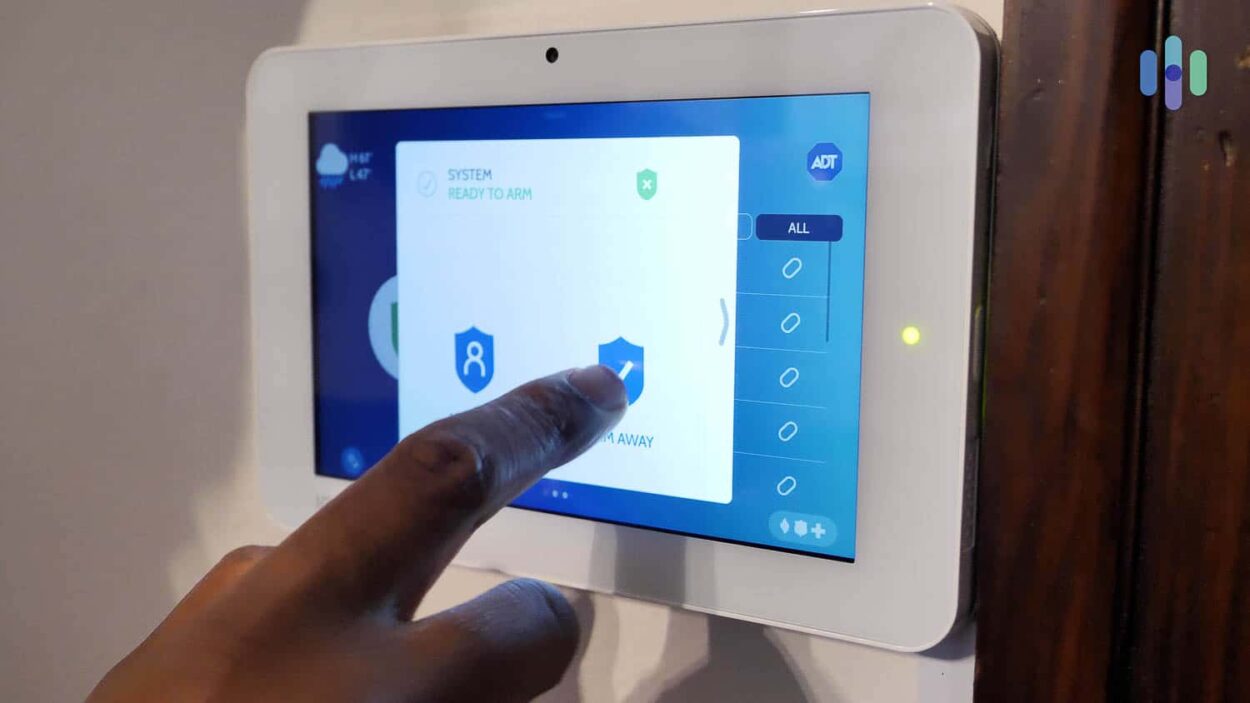
- Select “Bypass Zones“: From the main menu, select “Bypass Zones.” You should see a list of all the zones in your security system.
- Select zones to bypass: Select the zones that you want to bypass using the additional control panel. You can bypass individual zones or multiple zones at once.
- Exit menu: Once you have selected the zones you want to bypass, exit the “Bypass Zones” menu.
- Disarm your system: When you are ready to disarm your system, enter your user code on either the primary or additional control panel.
It’s important to remember that bypassing zones should only be done when necessary, and you should always rearm those zones as soon as possible. If you’re unsure about bypassing zones or making changes to your ADT system, it’s best to contact ADT customer support or a professional installer for assistance.

Eliminating ADT Wireless Window and Door Sensors
If you want to eliminate ADT wireless window and door sensors from your security system entirely, you’ll need to follow a few steps to ensure that the sensors are properly removed. Here’s how to eliminate ADT wireless window and door sensors:
Before removing any sensors, you’ll need to disarm your ADT security system. You can do this by entering your security code on the control panel or using the ADT mobile app.
Identify the sensors you want to eliminate from your security system. ADT wireless window and door sensors are small and rectangular, with one half of the sensor attached to the door or window and the other half attached to the frame.
Then use a screwdriver or a flat tool to gently pry off the cover of the sensor. The sensor cover is typically held in place by clips or screws.
Once the cover is removed, you should see the battery inside the sensor. Carefully remove the battery by pushing it out or sliding it out of its compartment.
With the battery removed, you can now remove the sensor from the door or window frame. Gently pull the sensor away from the frame to detach it.
Once the sensor is removed physically, you need to disable it in the control panel. This is an important step because if you don’t disable the sensor in the control panel, your security system will continue to treat it as an active sensor.
After you’ve eliminated the sensor, it’s a good idea to test your security system to make sure that it’s still functioning correctly.
How to Uninstall ADT Wired Window and Door Sensors?
Existing cables will need to be pushed back through the walls, but all other stages are the same.
Typically, a tiny Phillips-head screwdriver is required to disconnect the wires from the window and door sensors.
You must do so from both the sensor and the actual control panel.
Once the wires have been entirely withdrawn, you may either pull them through the hole to remove them or leave them for future use.
For door sensors located on or near crown molding, use WD-40 or a similar silicone-removal-capable lubricant.
Eliminating Wire-In Window and Door Sensors
Some door and window sensors are flush with the frame, making them more difficult to remove.
Simply pull them out with your fingers or a screwdriver; the unconnected magnet will come out first, followed by the wires.
You may encounter sensors that are fastened into wood or drywall.
Remove the magnet and sensor plate to get access to the base plate’s screws.
ADT Replacement Kits

If you’re looking to replace ADT sensors or components in your security system, ADT offers replacement kits that contain everything you need to update your system. ADT replacement kits are designed to be easy to install and typically come with step-by-step instructions.
When ordering ADT replacement kits, it’s important to ensure that the kit is compatible with your ADT security system. If you’re unsure about which replacement kit to order or how to install it, contact ADT customer support or a professional installer for assistance.
Conclusion
- Removing ADT sensors from your home is a fairly straightforward operation. The Command Panel and Pulse network from ADT streamline the whole procedure.
- Before beginning, you must disable or skip the zones that apply to the sensor you want to delete. If you are moving into a house with an ADT system, you’ll likely encounter a more conventional control panel.
- Some door and window sensors are flush with the frame, making them more difficult to remove. For door sensors located on or near crown molding, use WD-40 or a similar silicone-removal-capable lubricant.
- If you wish to replace the sensors, you can obtain a contact repair kit from ADT.
Frequently Asked Questions
Can ADT Take Over Existing System?
Yes, they can take over the equipment to make it work with their monitoring service. In case, if you already have a home security system installed, ADT offers a $19.99 per month basic security package.
Does ADT Use Wi-Fi or Phone Lines?
ADT “Secure” operates over a landline connection for those seeking a solution that doesn’t need the internet. There are packages with a variety of smart home connection options for increased connectivity. Below, we shall describe the contents of each bundle and if an internet connection is required.